Oracle GoldenGate 23ai Microservices Architecture with Oracle Real Application Clusters Configuration
How to install and configure Oracle Goldengate 23ai Microservices
on an Oracle 19c RAC environment.
Environmental details:
Hosts: dbsrv01, dbsrv02
OS: Oracle Linux 8.8
Clusterware and database version :19.19.0.0.0
GoldenGate version: 23ai
XAG Agent: 10.2
Applied Patches: GI Release Update 19.19.0.0.230418
1. Create ACFS File System for storing the Golden
Gate deployment files on Oracle RAC.
Create the ACFS volume from the existing DATA disk group:
[root@dbsrv01 ~]# su - grid
[grid@dbsrv01 ~]$ echo $ORACLE_SID
+ASM1
[grid@dbsrv01 ~]$ asmcmd volcreate -G DATA -s 8G OGGVOL
Verify the volume was created and obtain the new volume device name.
[grid@dbsrv01 ~]$ asmcmd volinfo --all
Diskgroup Name: DATA
Volume Name:
OGGVOL
Volume Device:
/dev/asm/oggvol-382
State: ENABLED
Size (MB): 8192
Resize Unit (MB):
64
Redundancy:
UNPROT
Stripe Columns: 8
Stripe Width (K):
1024
Usage:
Mountpath:
[grid@dbsrv01 ~]$ /u01/app/19.3.0/grid/bin/crsctl stat res -w
"TYPE = ora.volume.type"
NAME=ora.DATA.OGGVOL.advm
TYPE=ora.volume.type
TARGET=ONLINE
, ONLINE
STATE=ONLINE on dbsrv01, ONLINE on dbsrv02
From the first node, create the ACFS filesystem on the new volume
device ("/dev/asm/oggvol-382") as "root" user.
[root@dbsrv01 ~]# /sbin/mkfs -t acfs /dev/asm/oggvol-382
mkfs.acfs:
version
= 19.0.0.0.0
mkfs.acfs: on-disk
version = 46.0
mkfs.acfs:
volume
= /dev/asm/oggvol-382
mkfs.acfs: volume
size
= 8589934592 ( 8.00 GB )
mkfs.acfs: Format complete.
Register the ACFS filesystem and new volume with the CRS as
"root" user.
[root@dbsrv01 ~]# /u01/app/19.3.0/grid/bin/srvctl add filesystem
-d /dev/asm/oggvol-382 -g 'DATA' -v OGGVOL -m /ogg23ai -u oracle
[root@dbsrv01 ~]# /u01/app/19.3.0/grid/bin/crsctl stat res -w
"TYPE = ora.acfs.type"
NAME=ora.data.oggvol.acfs
TYPE=ora.acfs.type
TARGET=OFFLINE, OFFLINE
STATE=OFFLINE, OFFLINE
Start the new ACFS CRS resource as "root" user.
[root@dbsrv01 ~]# /u01/app/19.3.0/grid/bin/srvctl start filesystem
-d /dev/asm/oggvol-382
[root@dbsrv01 ~]# /u01/app/19.3.0/grid/bin/crsctl stat res -w
"TYPE = ora.acfs.type"
NAME=ora.data.oggvol.acfs
TYPE=ora.acfs.type
TARGET=ONLINE
, ONLINE
STATE=ONLINE on dbsrv01, ONLINE on dbsrv02
[root@dbsrv01 ~]# df -h /ogg23ai
Filesystem
Size Used Avail Use% Mounted on
/dev/asm/oggvol-382 8.0G 566M 7.5G
7% /ogg23ai
[root@dbsrv02 ~]# df -h /ogg23ai
Filesystem
Size Used Avail Use% Mounted on
/dev/asm/oggvol-382 8.0G 566M 7.5G
7% /ogg23ai
Set the desired new ownership and permissions as "root"
user.
[root@dbsrv01 ~]# chown -R oracle:oinstall /ogg23ai
[root@dbsrv01 ~]# chmod -R 775 /ogg23ai
2. Install Oracle GoldenGate 23ai software locally on all
nodes in the Oracle RAC configuration, the goal is to ensure that each RAC
nodes operates independently to minimize downtime during software patching and
for the maintenance.
Unzip the folder that contains the Oracle GoldenGate installation
program.
[[oracle@dbsrv01 ~]$ cd /tmp
[oracle@dbsrv01 tmp]$ unzip -qa V1042871-01.zip
Prepare the response File with below parameter values.
[oracle@dbsrv01 ~]$ vi
/tmp/fbo_ggs_Linux_x64_Oracle_services_shiphome/Disk1/response /oggcore.rsp
INSTALL_OPTION=ora23ai
SOFTWARE_LOCATION=/u01/app/oracle/product/ogg23ai
INVENTORY_LOCATION=/u01/app/oraInventory
UNIX_GROUP_NAME=oinstall
Perform a silent installation using the response file.
[oracle@dbsrv01 ~]$
/tmp/fbo_ggs_Linux_x64_Oracle_services_shiphome/Disk1/runInstaller -silent
-showProgress -responseFile
/tmp/fbo_ggs_Linux_x64_Oracle_services_shiphome/Disk1/response/oggcore.rsp
Starting Oracle Universal Installer...
Checking Temp space: must be greater than 120 MB.
Actual 747 MB Passed
Checking swap space: must be greater than 150 MB.
Actual 4326 MB Passed
Preparing to launch Oracle Universal Installer from
/tmp/OraInstall2024-09-11_11-26-57AM. Please wait ...
You can find the log of this install session at:
/u01/app/oraInventory/logs/installActions2024-09-11_11-26-57AM.log
Prepare in progress.
.................................................. 10%
Done.
Prepare successful.
Copy files in progress.
.................................................. 59%
Done.
.................................................. 64%
Done.
.................................................. 69%
Done.
.................................................. 77%
Done.
.................................................. 82%
Done.
.................................................. 87%
Done.
.................................................. 92%
Done.
.................................................. 96%
Done.
Copy files successful.
Link binaries in progress.
.................................................. 96%
Done.
Link binaries successful.
Setup files in progress.
.................................................. 96%
Done.
.................................................. 97%
Done.
.................................................. 98%
Done.
.................................................. 99%
Done.
Setup files successful.
Setup Inventory in progress.
Setup Inventory successful.
.................................................. 95%
Done.
Successfully Setup Software.
..................................................
100% Done.
Finish Setup successful.
The installation of Oracle GoldenGate Services was successful.
Please check
'/u01/app/oraInventory/logs/silentInstall2024-09-11_11-26-57AM.log' for more
details.
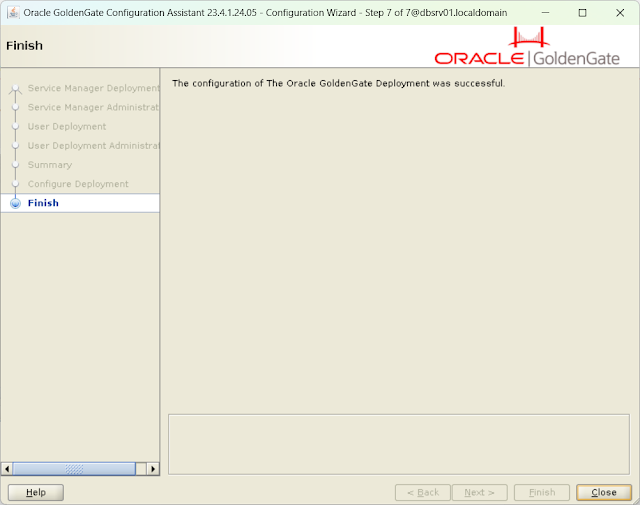
3. Create an Oracle GoldenGate Deployment using oggca as
"oracle" user.
Service Manager Deployment Home and Deployment home directory must
be on the ACFS file system.
Specify localhost as the listening hostname or address for Oracle
GoldenGate Microservices, Using localhost allows the deployment to be
started on all of the RAC nodes without the need for a Virtual IP address
(VIP).
Below is the screenshots of the recommended configuration.
[oracle@dbsrv01 ~]$ /u01/app/oracle/product/ogg23ai/bin/oggca.sh


4. Install the Oracle Grid Infrastructure Standalone Agent(XAG) to
manage GoldenGate from Oracle Clusterware as "grid" user.
To avoid conflicts with software patching, it is essential to
install the XAG software specifically outside of the Oracle Grid Infrastructure
home directory.
[root@dbsrv01 ~]# mkdir -p /u01/app/xag
[root@dbsrv01 ~]# chown grid:oinstall /u01/app/xag
[root@dbsrv01 ~]# chmod 775 /u01/app/xag
[root@dbsrv02 ~]# mkdir -p /u01/app/xag
[root@dbsrv02 ~]# chown grid:oinstall /u01/app/xag
[root@dbsrv02 ~]# chmod 775 /u01/app/xag
Unzip the folder that contains the XAG Agent.
[grid@dbsrv01 ~]$ cd /tmp
[grid@dbsrv01 tmp]$ unzip -qa p31215432_190000_Generic.zip
Install the XAG standalone agent.
[grid@dbsrv01 tmp]$ /tmp/xag/xagsetup.sh --install --directory
/u01/app/xag --all_nodes
Installing Oracle Grid Infrastructure Agents on: dbsrv01
Installing Oracle Grid Infrastructure Agents on: dbsrv02
Updating XAG resources.
Successfully updated XAG resources.
5. Prepare for Application Virtual IP Address (VIP) Creation.
A dedicated application VIP is required to allow access to the
GoldenGate Microservices using the same host name.
Application VIP automatically migrated to another node in
the event of a node failure, ensuring continuous service.
[root@dbsrv01 ~]# /u01/app/19.3.0/grid/bin/appvipcfg create
-network=1 -ip=192.168.56.90 -vipname=ogg23ai_vip -user=root
Using configuration parameter file:
/u01/app/19.3.0/grid/crs/install/crsconfig_params
The log of current session can be found at:
/u01/app/grid/crsdata/dbsrv01/scripts/appvipcfg.log
[root@dbsrv01 ~]# /u01/app/19.3.0/grid/bin/crsctl setperm resource
ogg23ai_vip -u user:oracle:r-x [root@dbsrv01 ~]#
/u01/app/19.3.0/grid/bin/crsctl start resource ogg23ai_vip
CRS-2672: Attempting to start 'ogg23ai_vip' on 'dbsrv01'
CRS-2676: Start of 'ogg23ai_vip' on 'dbsrv01' succeeded
[root@dbsrv01 ~]# /u01/app/19.3.0/grid/bin/crsctl status resource
ogg23ai_vip
NAME=ogg23ai_vip
TYPE=app.appviptypex2.type
TARGET=ONLINE
STATE=ONLINE on dbsrv01
6.Create an application service as "oracle" user.
An application service is required so that the Oracle Grid
Infrastructure Agent will automatically start the Oracle GoldenGate deployment
when the database is opened.
[oracle@dbsrv01 ~]$ srvctl add service -db rac -service
ogg23aiserv -role PRIMARY -preferred rac1 -available rac2
[oracle@dbsrv01 ~]$ srvctl start service -service ogg23aiserv -db
rac
[oracle@dbsrv01 ~]$ srvctl status service -service ogg23aiserv -db
rac
Service ogg23aiserv is running on instance(s) rac1
7.Configure Oracle Grid Infrastructure Agent (XAG) as
"root" user.
Oracle GoldenGate must be registered with XAG so that the
deployment is started and stopped automatically when the database is started
and the file system is mounted.
To register Oracle GoldenGate Microservices Architecture (OGG MA)
with the Oracle Grid Infrastructure Agent (XAG), use the following command
integrates GoldenGate with Oracle Clusterware.
[root@dbsrv01 ~]# /u01/app/xag/bin/agctl add goldengate
ogg23ai_ha --gg_home /u01/app/oracle/product/ogg23ai --service_manager
--config_home /ogg23ai/sm/etc/conf --var_home /ogg23ai/sm/var --vip_name
ogg23ai_vip --port 9100 --oracle_home /u01/app/oracle/product/ogg23ai/lib/instantclient
--adminuser oggadmin --user oracle --group oinstall --filesystems
ora.data.oggvol.acfs --db_services ora.rac.ogg23aiserv.svc --use_local_services
--nodes dbsrv01,dbsrv02
Enter password for 'oggadmin' :
[root@dbsrv01 ~]# /u01/app/xag/bin/agctl start goldengate
ogg23ai_ha
[root@dbsrv01 ~]# /u01/app/xag/bin/agctl status goldengate
ogg23ai_ha
Goldengate instance 'ogg23ai_ha' is running on dbsrv01
To manually relocate Oracle GoldenGate deployment to another node as "root" user.
[root@dbsrv01 ~]# /u01/app/xag/bin/agctl relocate goldengate
ogg23ai_ha --node dbsrv02
[root@dbsrv01 ~]# /u01/app/xag/bin/agctl status goldengate
ogg23ai_ha
Goldengate instance 'ogg23ai_ha' is running on dbsrv02
Connect to the Oracle GoldenGate Service Manager through the
application VIP (Virtual IP).
http://192.168.56.90:9100


Comments
Post a Comment